Remember the power of AutoLisp? ScriptX brings that same potential to editing cross sections in Corridor EZ for Civil 3D—without the coding. Simply describe your variable design elements in plain language, and ScriptX will craft the script for you. No programming expertise required.
Save time, reduce errors, and explore new design possibilities with ScriptX’s intuitive natural language interface. Collaborate seamlessly with team members using ScriptX’s script sharing capabilities. Or tap into a growing community of designers with ScriptX’s public library of shared scripts.
Chat Driven Scripting for Precise Cross Section Editing
Autodesk revolutionized the CAD market with the introduction of AutoLisp. It allowed early programmers to introduce and share lisp routines to address specific industry needs. But, programming with AutoLisp quickly evolved beyond the skills of most designers.
ScriptX is our new scripting tool for Corridor EZ for Civil 3D, designed to work with the existing Variations feature. It gives designers the power to write their own scripts for editing cross sections, which can be as simple or as complex as needed.
With ScriptX, whether you are constructing a conditional retaining wall or making minor sectional adjustments, designers can start with the basics and progressively build up their scripting skills, customizing edits as they grow more comfortable with the tool’s capabilities.

Logical Operations for Customized Editing
ScriptX enhances cross section editing by allowing designers to embed conditional logic directly into their designs. A designer can, for example, set a cross section to widen to an alignment only if it meets certain conditions. Similarly, sections can be programmed to insert or remove themselves automatically, depending on the logic criteria established in the script.
Integration into Design Data Form
Scripts created with ScriptX are added to the Variations list through the Design Data Form. By specifying a chainage range, the script is configured to methodically apply its logic to each corresponding section within the range. These ScriptX scripts function in tandem with other Variations, ensuring they are executed in sequence as the software progresses through the Variations list.

ScriptX Basics: Getting Started
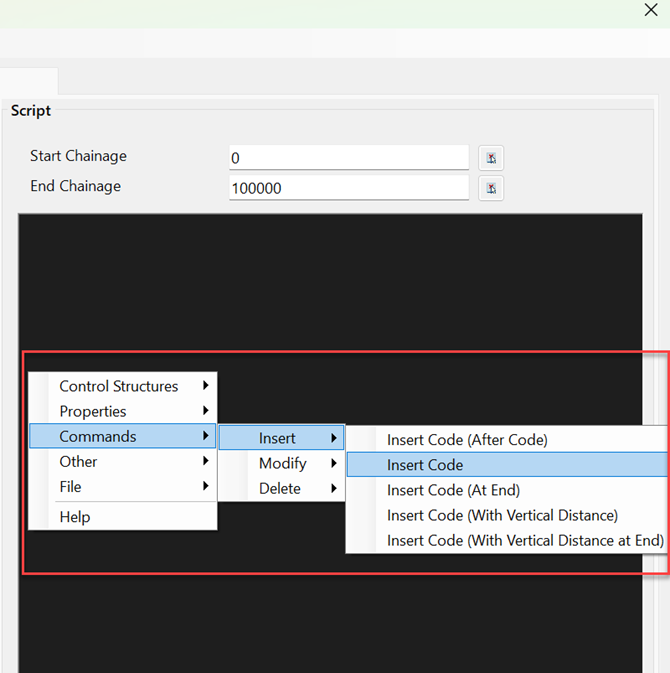
After creating a new ScriptX script entry, begin by right-clicking within the script editor to access the Menu system. Here, you will find a helpful link to the ScriptX help system — your go-to programmer’s reference that details the script’s syntax and provides easy-to-follow examples to kick-start your scripting process.
The Menu System is organised into categories: ‘Control Structures’, ‘Properties’, and ‘Commands’. ‘Control Structures’ help you weave in logic, like ‘if’ statements, into your scripts. ‘Properties’ give you access to design details such as current code elevations or offsets. ‘Commands’ are there for you to make edits to the current cross section, including inserting, deleting, or modifying codes.
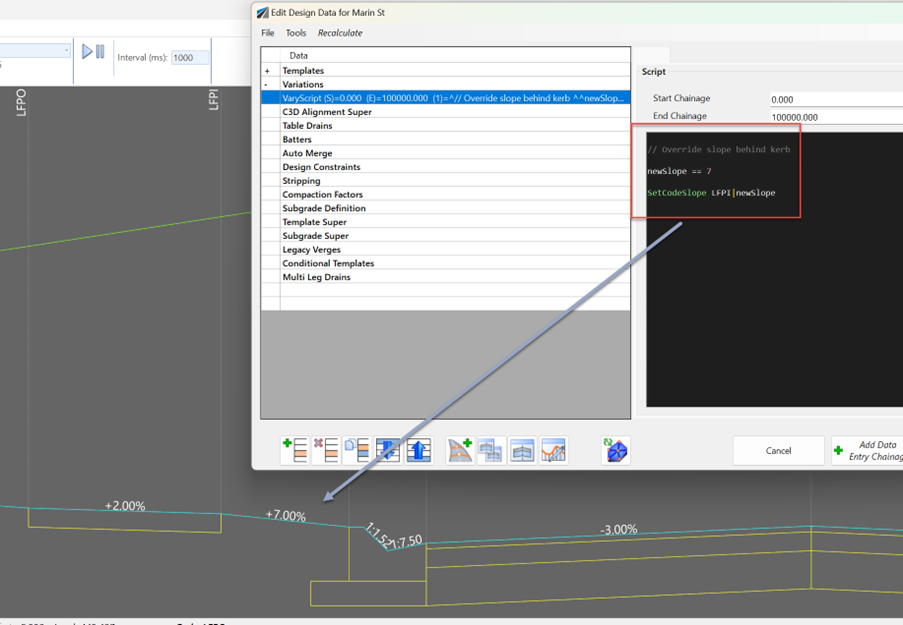
Below is a straightforward example of ScriptX in action:
This basic script defines a variable called ‘newSlope’ with a value of 7, which is then assigned to the slope property of the LFPI code.
// Override slope behind curb
newSlope == 7
SetCodeSlope LFPI|newSlope
ScriptX Collaboration: Share, Download, and Customize with Ease
Sharing and collaboration are easy with ScriptX. To save a script, select ‘Save Script’ from the ‘File’ section in the Menu System. To use a script someone else has created, choose ‘Insert Script’ from the same menu.
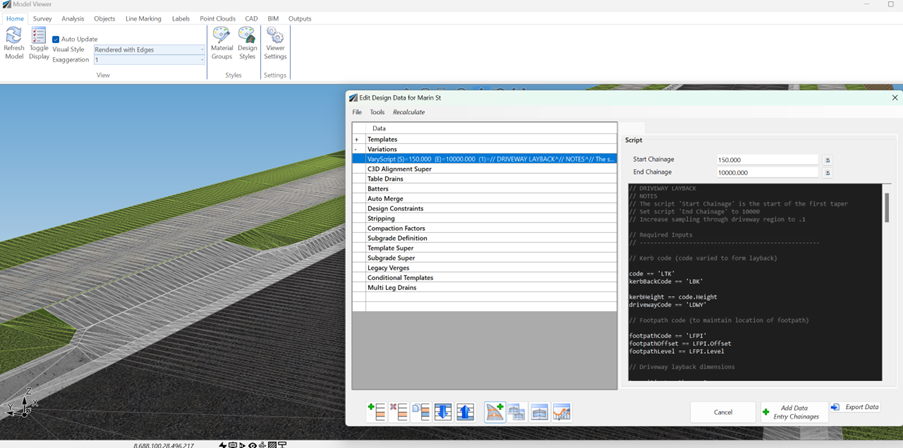
Download a Driveway Layback Example Script:
Ready to see ScriptX in action? Click below to download a sample script for a driveway layback. Once you have inserted the script into your project, you can adjust the variables to specify the layback dimensions and modify the necessary codes.
Below is a link to download the Driveway Layback script:
Download: https://www.downloads.civilsurveysolutions.com//TrainingFiles/DrivewayLayback.scX
In Conclusion: Unleashing Full Potential with ScriptX
The introduction of ScriptX marks a new era of versatility in editing cross sections within Corridor EZ for Civil 3D. To fully harness the capabilities of ScriptX, delve into our Programmer’s Reference, which offers a wealth of information to enhance your scripting skills.
ScriptX Programmer’s Reference: https://www.downloads.civilsurveysolutions.com/CSD/Documents/ScriptX-ProgrammersReference.pdf
We are excited to see the sophisticated solutions you will craft with ScriptX at your fingertips.